Phone Repair Made Easy: Your DIY Lifesaver!
Step into the world of DIY phone repair with our easy-to-follow guide. Discover practical tips, essential tools, and simple steps to fix common smartphone issues. Perfect for beginners inspired by Carissa Bowden's tutorial. Empower yourself to repair and save the day
DIY

Hey there, tech lovers! Let’s face it, our smartphones are practically glued to our hands these days, right? They’re like our trusty sidekicks – always there when we need them. But, oh boy, when they go kaput, it’s like losing a limb! But don’t you worry, I’ve got your back. This guide, inspired by the ever-so-helpful Carissa Bowden’s YouTube wisdom, is your golden ticket to becoming a phone repair ninja.
Getting Ready: The Nitty-Gritty
Before we dive in, let’s talk prep work. Trust me, a little homework now can save you from a major “oops” later. Carissa’s video is a fab starting point, but hey, there’s a world of info out there. Knowledge is your superpower, especially when you’re going DIY.
Essential Gizmos and Gadgets
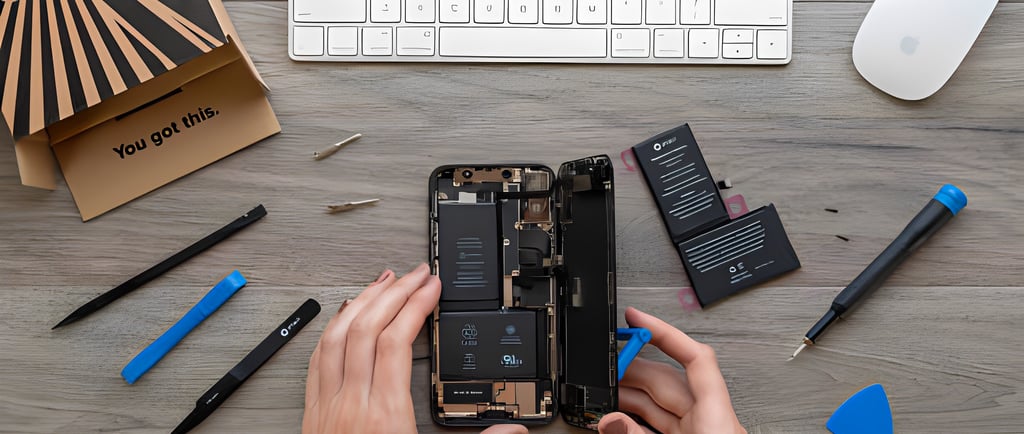
Here’s your starter kit:
A tiny Phillips screwdriver (aim for 1.5mm)
Something to keep those sneaky screws in check – magnet, tape, or tray
A pick or a slim jimmy tool for prying
Disassembly: The Fun Begins
Carissa’s pick for the tutorial is an LG phone – a real peach for beginners. Kick things off by waving goodbye to the back cover. You’ll find about a dozen screws hanging out there. Unscrew them with care. Next, gently, and I mean gently, pry apart the top layer from the phone’s guts.
The Grand Tour Inside
Once you’re in, it’s like a tech treasure chest:
The battery and its buddy, the connector
The camera and its wiry web
The speaker and its links
Where the screen shakes hands with the phone
Detective Work: Spot the Culprits
Keep an eagle eye out for:
Unhappy connections
Wires that look like they’ve seen better days
Anything that just seems… off
Nudge these troublemakers gently back into place. If things still aren’t peachy post-reassembly, you might need a replacement part.
Reassembly: Piece It Back Together
Putting Humpty Dumpty back together is just retracing your steps. Start with the screen. Make sure everything’s lined up like a perfect puzzle. Press the parts together gently – no Hulk smashes, please.
The Moment of Truth: Testing Time
Once it’s all back in one piece, it’s crunch time. Fire up your phone and cross your fingers. Check if everything’s shipshape. This is make-or-break time – did your phone come back to life?
DIY Empowerment: You’ve Got the Power!
This guide isn’t just a bunch of steps; it’s your ticket to being the hero of your own tech story. With a sprinkle of patience and the right toolkit, you’ll be amazed at what you can fix.
Pro Tips for Being a Phone Fixing Pro
Stay Sharp
Keep tabs on those screws and bits. A slip-up here can turn into a headache later. Be smart – use containers or tape to keep everything organized.
Handle with Care
Phones are like glass slippers – delicate and precious. Be gentle when prying and putting things back together. Forcing things? Big no-no.
Level Up
Feeling comfy with the basics? Time to up your game. The internet’s bursting with resources to boost your repair skills.
Safety First
Always, and I mean always, work in a well-lit, static-free zone. Power off and yank the battery out before you start.
Conclusion: You’re Ready to Rock!
And there you have it! With this guide, you’re well on your way to becoming a phone repair guru. Next time your phone throws a tantrum, remember – you’ve got the magic touch. Or you're always welcome at Cell Care Phone Repair if there's any complex repair you need. You know, we're the best in town!😉
